Cinna Stix

OKAY, OKAY I’M BACK. Sorry that took so long. I’ve still been cooking, I just haven’t had time to blog anything in months. But now that my favorite cooking season is right around the corner I’ll try to be better about sharing what I’m up to in the kitchen.

This hurrr is an extremely easy and satisfying recipe for something we all know and love whether we admit it or not: Domino’s Cinna Stix. Because sometimes you don’t want to order a pizza you’re not craving just to have these bad boys delivered curbside.

fullsizeoutput_f40

These cinnamon coated dough pillows (#metaphor) come together in just about 20 minutes and require very little prep and cleanup. So, perfect for satiating last minute sweet tooth demands.

fullsizeoutput_f3f

This recipe is adapted from food.com.

INGREDIENTS:

1 bag store bought pizza dough – – Trader Joe’s has a great one that’s only $1.29

1/4 cup margarine minus a tsp or so, melted

1/3 cup sugar

1 3/4 tsp cinnamon

8 oz. confectioners sugar

2-3 tbsp milk + more if needed

1/4 tsp vanilla extract

1 tbsp butter, melted

DIRECTIONS:

For the cinna stix:

Preheat the oven to the suggested baking temp for your store bought dough. (I use Trader Joe’s and their temp is 425 F).

Grease a baking sheet and set aside.

In a small bowl, combine the cinnamon and sugar. Use a whisk to eradicate any lumps!

Stretch the dough into a large rectangle. It should be thin but not translucent. Brush with the melted margarine, then sprinkle with the cinnamon sugar mixture. Slice vertically and then 8 times horizontally so that you’re left with roughly 16 sticks. Bake according to the instructions that came with the dough. (I baked mine for 14 minutes). The cinnastix should be golden brown on the edges and the sugar should no longer look raw. Be cautious when removing from the oven since the sugar will be extremely hot.

fullsizeoutput_f3c

For the icing:

While the dough is baking, place the confectioners sugar in a bowl, then add the butter, milk, and vanilla. If the icing is too thick, add more milk by the half tablespoon.

Once cool enough to eat, dip the cinnastix in the frosting and enjoy!

Cinnastix are best when eaten the day of, so either invite friends over or gorge yourself on hot cinnamon sugar bread.

fullsizeoutput_f3a

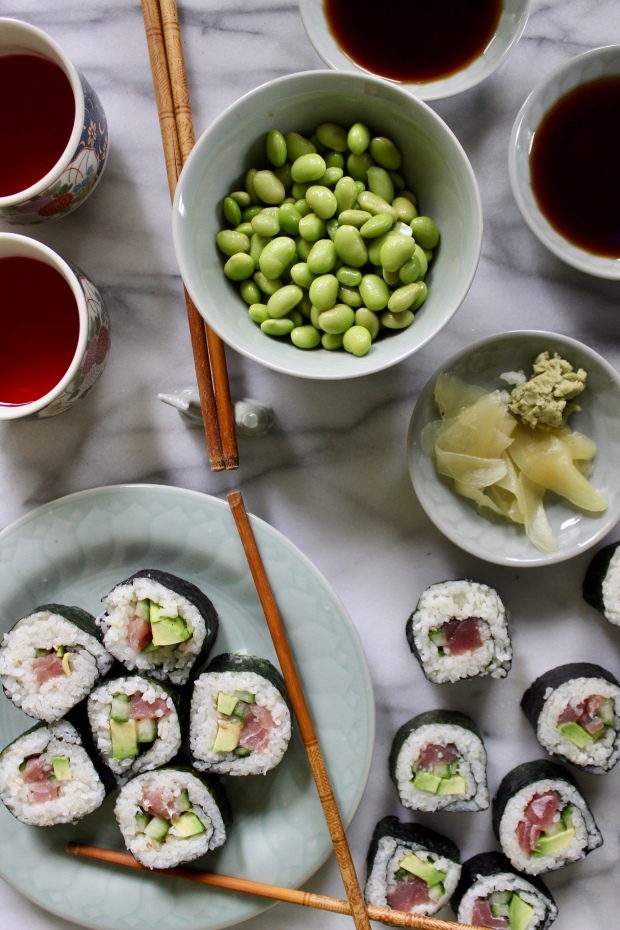
Tuna Avocado Sushi

I’m never completely full after eating sushi. It’s just not something that happens. Reason being, the most I’ll ever order is three rolls; otherwise it gets too pricey. I’ve wanted to try making it at home for a long time to solve this issue (I always imagined making a sushi boat’s worth), but hesitated because I didn’t know where to find sushi grade fish*.

*I live on an island so I really should have thought harder on that one.

fullsizeoutput_11d1

In a moment of serendipity my friend and I decided to make it a few months ago. I volunteered to get most of the ingredients so long as he got the fish. HEE HEE HEE, the fish problem was off my hands. He bought pre-packaged sushi grade tuna at Whole Foods and neither of us died, so I decided to make it again today with my friend Lauren. I got my sushi grade tuna from Fairway since that’s closer to me than Whole Foods– though I only realized Fairway had sushi grade tuna AFTER chatting with multiple Whole Foods fish department representatives about their sashimi inventory over the phone.

If you’re going to make this recipe, only do so if you can find safe, sushi grade tuna!! Do not go rogue!

fullsizeoutput_11cf

Makes 3 rolls

INGREDIENTS:

5 oz. sushi grade tuna

1 cup (uncooked) sushi rice, prepared according to package instructions — you will need 2 tablespoons of rice wine vinegar for this

3 sheets nori, prepared according to package instructions

1/2 cucumber, thinly julienned

1/2 avocado, thinly sliced

1 tablespoon toasted sesame seeds

Soy sauce, if desired

Pickled ginger, if desired

Wasabi, if desired

fullsizeoutput_11d2

DIRECTIONS:

Roll out a sushi mat or a clean kitchen towel. Place one sheet of the prepared nori on the mat or towel. (If you’re using a towel you may want to cover it in nonstick saran wrap to assist with the rolling process).

Put a third of the cooked rice on the nori and press it evenly into the seaweed, keeping it about a half inch away from the edges. Sprinkle a third of the sesame seeds over it. Lay the cucumber, avocado, and tuna at the edge of the nori that is closest to you. Using the mat/towel to guide you, gently roll it away from you.

fullsizeoutput_11d0

Once it is fully rolled up, squeeze the mat/towel to tighten the roll. Remove the towel/mat and slice the roll into 5 or 6 pieces.

Serve with soy sauce, wasabi, and/or pickled ginger if desired.

fullsizeoutput_11d3


Hummus

Hummus is a divisive subject in my family. Some of us like it creamy, some like it a little chunky (I’m with you; I think the chunky hummus lovers are crazy too). Some adore store brand hummus such as Sabra, while others scoff at its pasty texture (yeah, this is the chunky hummus lover).

Personally, I’m fine with store bought or homemade, but I recently had a hummus awakening that drove me to make some myself and to try a couple new seasonings. “What could this revelation have been?”, you wonder. Answer: I went to a restaurant on the west side a few months ago called Hummus Kitchen. And. Their. Hummus. Was. Phenomenal. Like, can’t stop talking about it phenomenal. Like, told my coworkers that they have no option but to go there phenomenal. It was warm, covered in chicken shwarma, and drizzled with olive oil. The addition of olive oil to the top of hummus is probably completely normal but my family has never made it that way, so it was a lightbulb moment for me.

fullsizeoutput_1145

The restaurant itself was frigid because of its petite size and my table’s proximity to the street, but the food and friendly waitstaff completely made up for it. Oh, and did I mention their freshly made lemon-mint lemonade? I’m a sucker for flavored lemonades. Lavender, mint, whatever… I’m there.

This recipe is ever so slightly adapted from Bon Appetit.

fullsizeoutput_1142

fullsizeoutput_1144

INGREDIENTS:

1 15½-ounce can chickpeas, rinsed, drained

½ cup tahini, well mixed — this will take a couple minutes but don’t despair, it will become smooth!

3 tablespoons fresh lemon juice

1 garlic clove, finely grated (I used a garlic press)

¾ teaspoon (or more) kosher salt

10 cranks freshly ground black pepper

¼ teaspoon ground cumin

3 tablespoons olive oil, plus more for drizzling

2 tablespoons water

1 teaspoon sesame seeds

1 pinch dried oregano

fullsizeoutput_1146

DIRECTIONS:

Combine the chickpeas, tahini, lemon juice, garlic, salt, black pepper, cumin, and water in the bowl of a food processor. Process until smooth, about 1 minute. Slowly drizzle in the olive oil as you continue to process the mixture for about a minute more.

Put the hummus in a shallow bowl or a plate with raised edges. Drizzle a tad more olive oil over the hummus and sprinkle on the sesame seeds and oregano.

Enjoy with veggies, pita, or on a spoon!

fullsizeoutput_1147


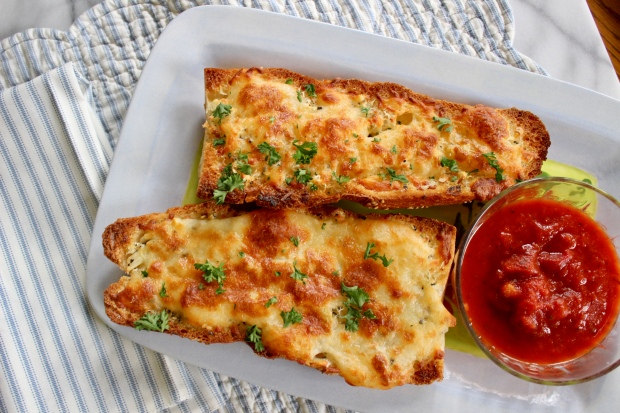
Cheesy Garlic Bread

Growing up in a heavily Italian area of New York, I’ve had every type of garlic bread imaginable. Garlic knots, garlic rolls, French-bread-cut-in-half garlic bread… the delicious list goes on. I have two favorite garlic bread experiences in recent memory. The first was the French bread type of garlic bread at a restaurant called Parm (think old standby Italian spot meets trendy, Instagram-worthy chain). The second was from a pizza place on the Upper West Side, and it entailed six, count ’em, SIX, garlic knots smothered in a melty layer of mozzarella cheese. It was those knots that got me thinking, “I should make this myself so that I can eat them ALL THE TIME!!! Will I gain weight? Probably… but that’s a small price to pay for such a satisfying lifestyle”.

I came down a little from that initial cheese high, but was still craving more. So, you guessed it! I decided to marry these two garlic rich experiences and make my own supply.

fullsizeoutput_1135

fullsizeoutput_1132

If you’re wondering why the end of the baguette looks like a butt, it’s because it was meant to look like a fish tail but the baker had a bad day. No need to buy a fancy loaf for this recipe– I got this butt loaf at my local supermarket!

INGREDIENTS:

1 baguette, cut crosswise and then lengthwise

1 1/2 cups shredded mozzarella

1/4 cup grated parmesan

6 Tbsp butter, melted

5-6 garlic cloves, finely chopped


2 Tbsp chopped parsley

Garlic powder, to taste

Italian seasoning, to taste

1/2 cup red sauce, if desired

fullsizeoutput_112c

fullsizeoutput_1130

DIRECTIONS:

Makes 4 large servings or 8 small servings (i.e. for a non-monster unlike myself)

Preheat the oven to 350 degrees. Line a baking sheet with foil. Place the cut baguette, crust side down, on the sheet. Set aside.

Sprinkle garlic powder and Italian seasoning into the melted butter. Add the chopped garlic cloves and stir. Refrigerate for 10-15 minutes, or until the butter has started to harden again.

Spread the butter mixture over the doughy parts of the baguette. Sprinkle the baguette slices with mozzarella, dividing it evenly over each one. Repeat with the parmesan.

Bake for 15 minutes, then broil for 2-3 minutes, or until the cheese starts to bubble and brown. If you don’t have a broiler you can skip this step, but it makes the flavor even better!

fullsizeoutput_1131

Heat up your red sauce in the microwave or in a small saucepan.

Sprinkle the baguettes with parsley and let cool until it is nice and warm but not hot. Dip in your red sauce and enjoy!!

fullsizeoutput_1134

Jumbo Sugar Cookie

As much as I love baking, sometimes I’m not in the mood to go through all the setting up and cleaning up involved. That’s why this recipe, courtesy of Sally’s Baking Addiction, caught my eye– it just makes one huge sugar cookie. Meaning, it’s a much smaller project than making a full batch. It requires lower ingredient measures and therefore, smaller baking tools can be used.  I LOVE when a recipe only needs 1 or 2 small mixing bowls and teaspoon/tablespoon measures. Small bowls can be popped in the dishwasher and more of them can simultaneously fit on drying mats. Aka, quicker and easier cleanup. Oh, and did I mention the best part? If you only make one giant cookie you don’t have to worry about cookie vultures*; if there’s only one cookie, they know who it’s for.

*A cookie vulture is a person or animal that circles the kitchen while you’re baking and snags a cookie before it’s even hit the cooling rack. When I’m not the one baking, I am one hundred percent a cookie vulture.

This is the first time I’ve made a small batch version of a classic, and part of the reason I chose this recipe to be my first is that it still calls for an oven. I keep seeing recipes for single serving microwave brownies and microwave cakes, but there’s something about *baking* by *microwave* that feels wrong to me. Would it taste the same? Maybe. Would I think it tasted the same? Most likely not.

fullsizeoutput_1126

INGREDIENTS:

2 Tablespoons unsalted butter at room temperature

3 Tablespoons sugar

2 Tablespoons beaten egg (crack the egg, beat it, and use 2 tbsp)

1/2 teaspoon vanilla extract

6 Tablespoons flour

1/4 teaspoon baking soda

1/4 teaspoon salt

1/4 teaspoon cream of tartar

2 Tablespoons sprinkles — the more colorful, the better!

fullsizeoutput_1122

DIRECTIONS:

Preheat oven to 350 degrees. Either spray a baking sheet with non-stick spray or cover it with a piece of parchment paper.

In a small bowl, cream the butter and sugar. Stir in the 2 Tbsp of egg and the vanilla extract.

Add the remaining ingredients and mix until just combined. Be careful not to overdo it!

fullsizeoutput_1123

Flip the cookie dough out of the bowl and onto the baking sheet so that it looks like a tall ball (if it’s too flat it will be way too thin!). Bake for approximately 15 minutes until the edges are lightly browned. I took mine out at 13 minutes because I wanted an ooey gooey center, but that’s your call! Just remember that it will continue baking for a few minutes after you take it out of the oven, so don’t overcook it.

Allow the cookie to cool completely on the cookie sheet– no cooling rack needed here.

fullsizeoutput_1124


Cup of Dirt

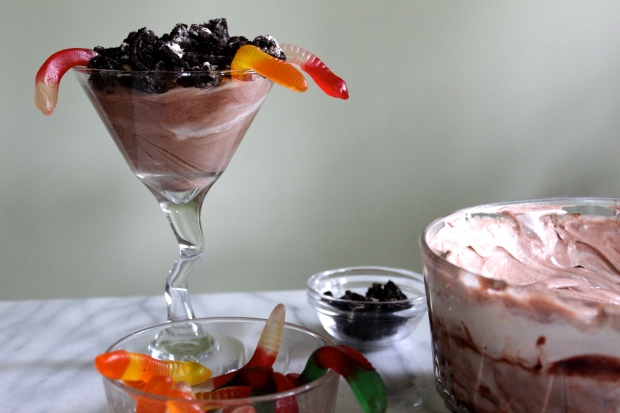
Growing up, my favorite place to get dessert (besides cheesecake in Philadelphia…), was Ground Round. Ground Round, for those of you unfamiliar with the 90’s haven, was a chain restaurant that led kids eat for a cent per pound of their body weight. Crazy, right? Yes, crazy. And crazy cheap. But the best part for me as a kid was the dessert. Their specialty, if you will, was cup of dirt. A child friendly delicacy made out of pudding, Cool Whip, crumbled Oreos, and gummy worms. They were always a little chintzy with the worms, so I had to ration them out through the meal. So now that I’m an adult and it’s within my power to add more worms, I decided to make them on my own.

IMG_3516

INGREDIENTS:

Makes about 6 servings

1 package of chocolate pudding, made

1 8 oz tub of Cool Whip, thawed

1 small package of gummy worms

1 sleeve of oreos, crumbled (I smashed mine with a meat mallet)

IMG_3520

DIRECTIONS:

In a large bowl, fold the Cool Whip into the pudding. Be careful not to over mix. Put a few spoonfuls into a small glass. Slide a couple of gummy worms into the pudding, letting them hang over the side of the glass. Top with Oreo crumbles. Repeat with remaining ingredients.

IMG_3525


4th of July Berry Pie

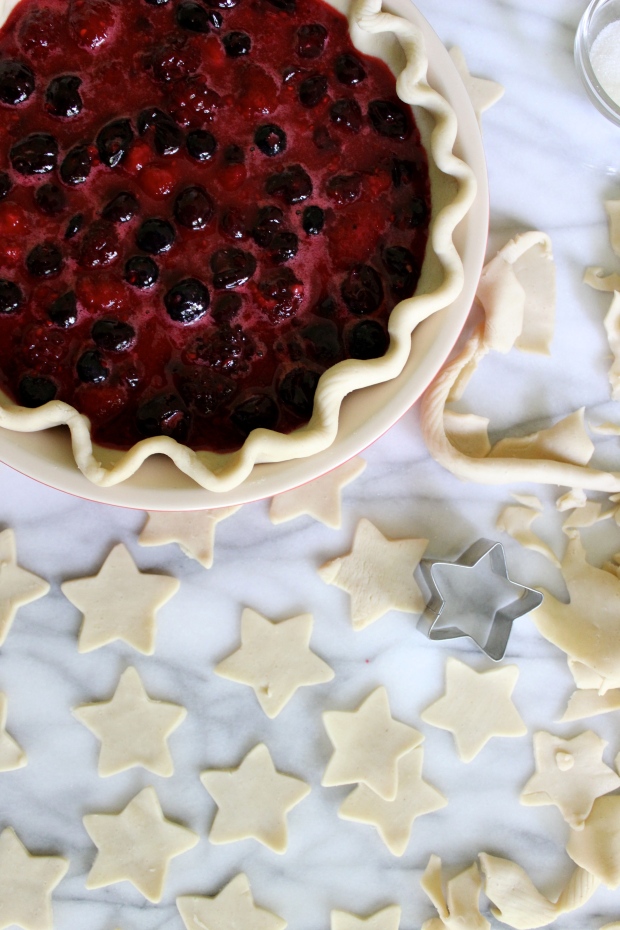
The past few weeks I’ve been in a heightened state of spring cleaning. Throwing out random receipts (except the ones from Sur and Moonlight Rollerway in LA, obv), old shoes, and a terrible hat collection has been my go-to pastime. As I ran out of things to toss from my room, I set my sights on the refrigerator. In it, I found remnants of my insanely brief smoothie faze: a bag of frozen mixed berries. Next to this sad ghost of a healthier me sat an unopened bag of frozen cherries, which were leftover from last week’s cherry pie. In a fit of glorious, cleaning-driven energy I whipped up this five berry pie. It’s based on a recipe from Food Network, though I changed it a little bit to make it tarter since I love a good tang in my pie. I also used a star shaped cookie cutter from Christmas to make cute stars to top the pie with, turning what would be a regular, ho-hum-da-dum pie into a stunningly fabulous Fourth of July Berry Pie.

IMG_3488

IMG_3484

INGREDIENTS:

4 cups of frozen berries, thawed (I used cherries, strawbs, raspberries, blackberries, and blueberries)

2 Pillsbury pie crusts

1 1/4 cups granulated sugar (you can use a little more or a little less depending on how sweet you want the filling to be)

4-5 tbsp cornstarch (depending on how thick you want it to be– I’d start with 4 and work your way up if you need to add more)

1/8 tsp vanilla

1-2 tbsp lemon juice

1 1/2 tbsp butter, to dot

1 tbsp granulated sugar, to sprinkle

IMG_3437

DIRECTIONS:

Place berries in medium saucepan and place over heat. Cover. After the cherries lose considerable juice, which may take a few minutes, remove from heat. In a small bowl, mix the sugar and cornstarch together. Pour this mixture into the hot berries and mix well. Mix in the lemon and vanilla. Return the mixture to the stove and cook over low heat until thickened, stirring frequently. Remove from the heat and let cool– I always lose patience and just wait until it’s not hot… oh well. If the filling is too thick, add a little water, too thin, add a little more cornstarch.

Preheat the oven to 375 degrees F.

Place one Pillsbury crust in the pie pan. Using a star cookie cutter, punch stars out of the other one. Set aside.

IMG_3442

Pour the cooled berry mixture into the crust. Dot with butter. Top with the star cutouts, then sprinkle the remaining tbsp of granulated sugar on top.

Bake for 45-50 minutes, or until the crust is golden brown.

IMG_3478


Fluffy Key Lime Pie

I made this pie what feels like ages ago, and just haven’t gotten around to posting it. Which is a shame, because it’s the perfect summer pie in a couple of respects. 1. It’s made with key limes, which hit their peak around now. And 2. It’s a Weight Watchers recipe, so you don’t have to eat it and then worry about sinking to the bottom of the pool. Not that that’s how eating works, but you know the feeling.

IMG_3418

3 weeks ago I went to the beach with my friend Ashleigh after stopping at the deli to pick up some sammies. Naturally, I picked the hottest, most buttery, sauerkraut filled sandwich there ever was. Eating that on the beach, though decadent and clearly uprooting social norms, is probably not something I would do again. Although the melted butter dripping off of the bread did give my hands the beautiful sheen of a basted chicken, so maybe I should reconsider.

But I digress.

I first tried this recipe at least a decade ago, when some family members were on Weight Watchers. Even as a kid, I remember becoming obsessed with its light, marshmallow-esque texture and its tangy but sweet flavor. And the graham cracker crust?! Fuhgettaboutit!

INGREDIENTS:

1 package (.3 ounce) sugar-free lime gelatin

1/4 cup boiling water

2 cartons (6 ounces each) Key lime yogurt — try to find something that’s not full on Greek yogurt, since that’s so thick, but a derivative is fine

1 carton (8 ounces) lite Cool Whip

1 reduced-fat graham cracker crust (8 inches)

IMG_3368

DIRECTIONS:

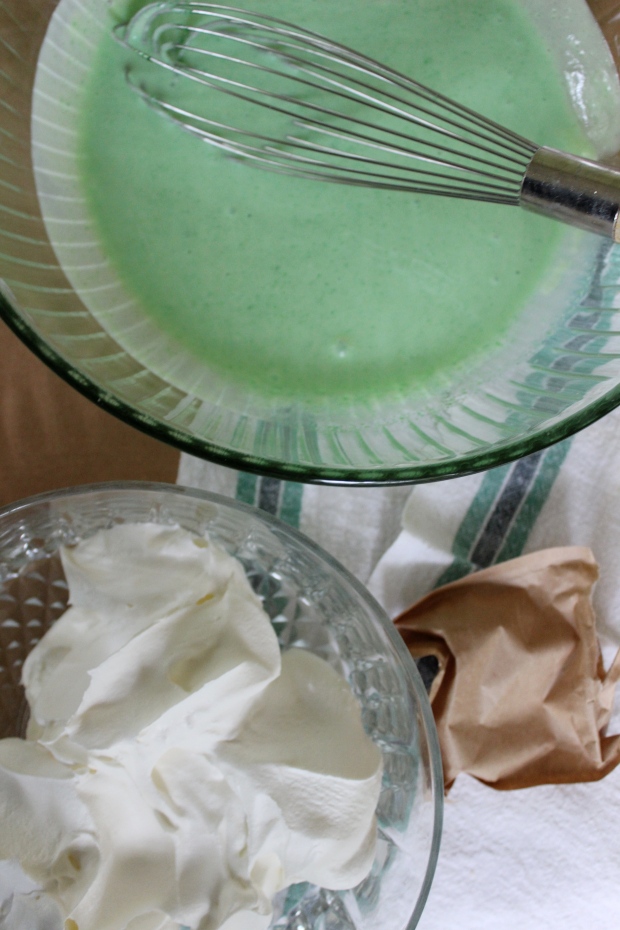
In a large bowl, dissolve gelatin in boiling water. Whisk in yogurt. Fold in Cool Whip. Pour into crust. 

Cover and refrigerate for at least 2 hours or until set.

Top with more Cool Whip (I assume you bought two..).

IMG_3412


Sprinkles Vanilla Cupcakes

I remember the first time I heard of the California based cupcake bakery, Sprinkles. I was watching acclaimed reality show “The Girls Next Door”, the fairytale saga of Hugh Hefner and his collection of girlfriends. Bridget, his number 2 GF, was throwing a birthday party and brought in Sprinkles cupcakes for the occasion. “Doesn’t everyone order cake for a birthday? What’s the big deal?”, you ask confusedly. Well when you have your own kitchen staff like the Playboy mansion, you don’t have ANYTHING brought in unless it’s really spectacular.

IMG_3199

Several years later when I was interning at “E! News” in LA, I finally laid my paws on one during an event at the office. Little did I know that by then, a Sprinkles had opened in my home state of New York. It was everything I dreamed of: moist and delicate, with dense, creamy frosting. So when I found a recipe online, of course I wanted to try it. The recipe I found is for their peppermint cupcakes, so I adjusted it slightly to be plain vanilla, and to make 24 cupcakes rather than 12. I also used this fondant recipe to make the heart garnishes. Yes, I know they make the cupcakes look vaguely boob-like, for better or worse.

IMG_3145

Servings: Makes 24 cupakes

INGREDIENTS:

For the cupcakes:

3 cups all-purpose flour , sifted

2 tsp. baking powder

1/2 tsp. coarse salt

1 cup whole milk , room temperature

4 tsp. pure vanilla extract

1 cup (2 sticks) unsalted butter , room temperature

2 cups sugar

2 large eggs, room temperature*

4 large egg whites, room temperature*

*If your eggs are warming too slowly, gently place them in a cup, then fill the cup with lukewarm (not hot) water until they reach room temperature

For the frosting:

2 cups (4 sticks) unsalted butter , firm but not cold

1/4 tsp. salt

7 cups confectioners’ sugar , sifted

2 tsp. vanilla extract

1 tsp. milk


DIRECTIONS:

For the cupcakes:

Preheat oven to 350°. Make sure the racks are in the lower two thirds of the oven. Line 2 cupcake tins with liners.

In a medium bowl, whisk together flour, baking powder and salt; set aside.

In a small bowl, mix together milk and extracts; set aside.

In the bowl of an electric mixer fitted with the paddle attachment, cream butter on medium-high speed, until light and fluffy. Gradually add sugar and continue to beat until well combined and fluffy. Reduce the mixer speed to medium and slowly add egg and egg whites until just combined.

With the mixer on low, slowly add half the flour mixture; mix until just blended. Add the milk mixture; mix until just blended. Slowly add remaining flour mixture, scraping down sides of the bowl with a spatula until just blended.

Divide batter evenly among prepared cupcake liners. Gently shake the tins so that any raised batter flattens. Transfer muffin tin to oven and bake until tops are just dry to the touch, 22 to 25 minutes– I know this is a super scary way to test them as opposed to the toothpick method, but they’ll keep cooking in the pan so take them out as soon as you can touch the top without getting any residue on your finger. Rotate tins once while baking. Transfer tins to a wire rack and let cupcakes cool completely in tin before icing.

IMG_3124

For the frosting:

In the bowl of an electric mixer fitted with the paddle attachment, beat the butter and salt on medium speed until light and fluffy, about 2 minutes.

Reduce the speed to low, gradually add the confectioners’ sugar and beat until incorporated. Add the extracts and milk and beat until smooth and creamy. Do not overmix or the frosting will incorporate too much air; it should be creamy and dense, like ice cream. Add additional milk, 1 teaspoon at a time, if frosting does not have a spreadable consistency.

IMG_3164

To assemble:

While gingerly holding a completely cooled cupcake, scoop a large amount (thing about a half a tennis ball) onto the top of the cupcake using a spatula. Then, swipe the sides of the cupcake in a circular motion until the top looks flat and the sides are smooth, almost like a volcano. Place any decorations on top, then eat!

These can be stored in an airtight container in the refrigerator for about 3-4 days.

IMG_3182


Boloco Buff Chick Burritos

When I was going to school in Boston, the ultimate treat was heading over to the Boloco on the corner and snaggle-snagging one of their hot and tangy buffalo chicken burritos. If it was a really special occasion I’d get the biggest size, but usually I stuck with a regular, or a mini if I was feeling particularly guilty about my purchase. For those of you who aren’t familiar, Boloco is a New England based chain restaurant that specializes in non-traditional burritos and shakes. And it’s amazing.

IMG_3033

The blue cheese and hot sauce look so happy together

Even now when I visit Boston I always stop by. I still relish the sound the tinfoil makes when it’s gingerly peeled back to reveal a steaming tortilla, ready to burst with hot sauce and blue cheese dressing. Just as you can hear the ocean when your ear is to a conch, you can hear the song of Boloco foil when your ear is to a ‘rito.

IMG_3039

My mouth waters every time I look at that sauce!

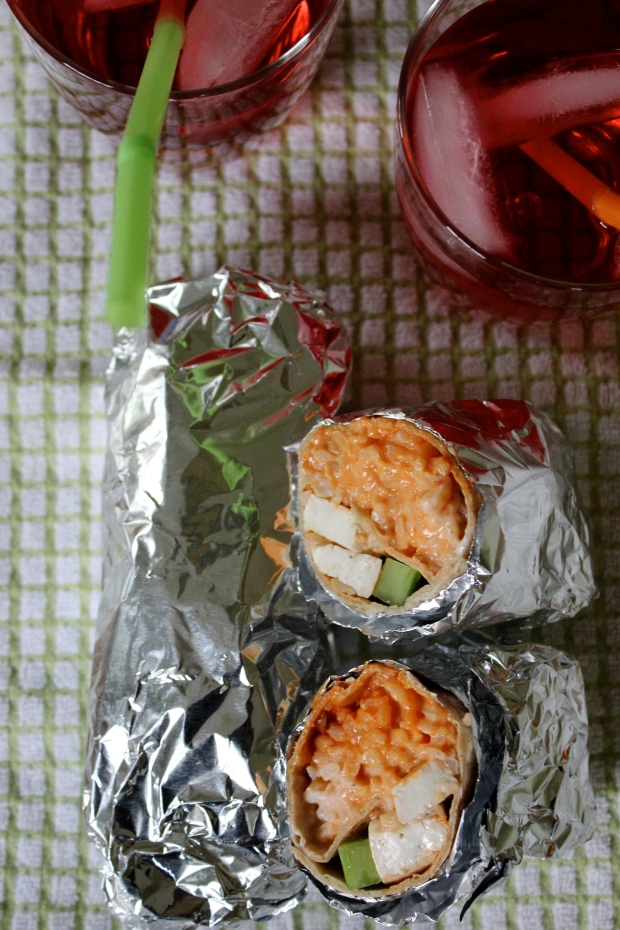
Since it’s not entirely feasible to drive to Boston every time I have a hankering for this edible bundle of joy, I made this copycat version. And if I do say so myself, it’s pretty darn close. It’s not a science, so these measurements are not exact. Add more or less of what you do or don’t like. Also, if you’re wondering why I used tofu instead of chicken,it’s because I’m just not in a meat mood this week! And this burrito is fantastic either way.

INGREDIENTS:

2 small whole wheat tortillas

1 cup cooked brown rice

1 stalk of celery, sliced

1/2 cup cooked tofu or chicken

2 tbsp Frank’s buffalo hot sauce

2 tbsp lite blue cheese dressing

IMG_3001

To cook tofu, simply sautee in about a tbsp of oil and seasoning for a few minutes on medium-low. I used sesame oil since tofu is so bland on its own.

DIRECTIONS:

Lay each tortilla on its own square of tinfoil. Split all ingredients between the two tortillas. With a spoon, swirl each pile of ingredients so that everything is mixed in. Tuck the flaps on the left and right sides of the tortilla inward, then roll away from you while continuing to tuck the sides in. Wrap in tinfoil. Eat!

IMG_3040

Served with hibiscus rooibos tea– very refreshing